 Blaine Siding
 Building New in Birch Bay Means Building for the Bay
Birch Bay sits right on the water, and that changes what a window installation needs to survive. A new-construction project here isn't just another framing job with holes cut for glass — it's an opportunity to get the building envelope right from day one, before siding, trim, and interior finishes make corrections expensive. Salt-laden air off the water, wind-driven rain that comes in sideways during winter storms, and a long stretch of the year where moss and algae thrive on shaded or north-facing walls all put extra demand on the windows and the flashing details around them.
We install new-construction windows on homes and additions throughout the Blaine and Birch Bay area, working directly with builders, framers, and homeowners during the construction sequence — not after the fact. This page covers what actually matters for a correct install in this specific environment.
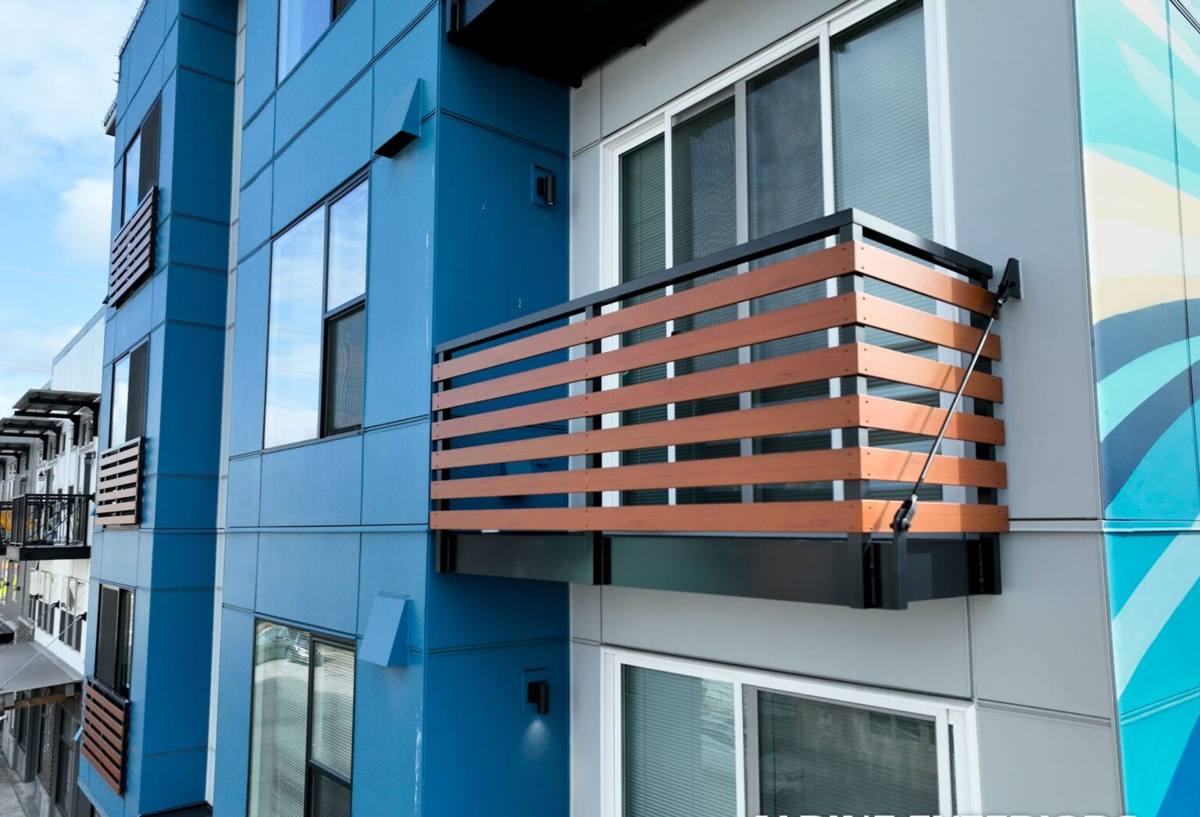
New-Construction Windows vs. Replacement Windows
These are two different products installed two different ways, and mixing them up leads to problems. A true new-construction window has a nailing flange (fin) around the perimeter of the frame. That flange gets integrated directly into the wall's water-resistive barrier (WRB) — the house wrap — before siding goes on. A replacement window, by contrast, is typically a flangeless "pocket" unit designed to fit into an existing opening without disturbing the exterior finish.
On a new build or an addition, you want the flanged, new-construction style. It allows the flashing to be layered correctly with the house wrap in a true shingle-lap sequence, so water is directed out and down at every layer rather than trapped behind the siding. Trying to save a step by using a replacement-style window on new framing usually means compromising that sequence, and in a climate that gets as much driving rain as Whatcom County does, that's not a place to cut corners.
Why This Matters More in Birch Bay Specifically
Homes closer to the water and on more exposed lots take wind loads and wind-driven rain that inland Blaine properties don't see as often. West- and southwest-facing walls catch the brunt of winter storms coming off the Strait. That exposure doesn't change what window you need structurally in most residential construction, but it raises the stakes on installation quality — a marginal flashing detail that might go unnoticed for years on a sheltered lot can show up as a leak or staining much sooner on a bay-front wall.
What Birch Bay's Marine Climate Demands
Three climate factors drive most of our decisions on new-construction window jobs here:
- Salt air: Airborne salt accelerates corrosion on exposed metal — hinges, cranks, locks, and fasteners. It also degrades some finishes faster than a typical inland install would see.
- Driving rain: Wind-driven rain doesn't just fall on a window, it gets pushed against and around it. That means the flashing, sill pan, and sealant details have to actively shed water, not just rely on a bead of caulk to keep it out.
- Long moss and algae season: Whatcom County's mild, wet stretch from fall through spring lets moss and algae establish on shaded siding, trim, and window sills. Organic growth holds moisture against the wall longer than it would otherwise sit, which is exactly the condition that turns a small flashing gap into a rot problem over time.
None of these factors change the basic physics of window installation, but together they mean there's less room for shortcuts than there would be on a dry-side-of-the-mountains build.
Getting the Flashing Right: The Part That Actually Prevents Leaks
Most window leaks aren't caused by the window itself — they're caused by how the opening was flashed. On new construction, we follow a sequenced approach at every rough opening:
- Frame the rough opening square, level, and to the correct dimension for the specified window unit.
- Install a sloped sill pan at the bottom of the opening with a back dam, so any water that gets past the window drains back out to the exterior instead of pooling on the sill.
- Apply self-adhered flashing tape or a compatible liquid-applied flashing at the jambs and sill, lapped correctly with the sill pan.
- Set the window, fasten through the nailing flange per the manufacturer's schedule, and check for square, level, and proper reveal.
- Flash the head and side flanges into the house wrap in true shingle-lap order — wrap over the top, sides lapped over the wrap below, head flashing lapped over the top — so water always moves down and out.
- Seal and back-caulk per the window manufacturer's requirements, leaving the designed weep paths clear.
This sequence is the same everywhere, but on a Birch Bay build we treat the sill pan and head flashing steps as non-negotiable rather than optional extras, given how much wind-driven rain the area sees over a typical winter.
Frame Materials and Hardware for Salt Air
Frame choice matters more here than it does further inland, mostly because of corrosion and moisture cycling. A few honest trade-offs:
| Frame Type | Coastal Performance | Maintenance |
|---|---|---|
| Vinyl | Good corrosion resistance since there's no exposed metal frame to pit; performs well in salt air | Low — occasional cleaning to keep salt film and moss spores off the surface |
| Fiberglass | Very stable dimensionally, holds up well to moisture cycling and temperature swings off the water | Low, though it carries a higher upfront cost |
| Vinyl-clad or aluminum-clad wood | Attractive interior wood option, but cladding seams and any exposed metal need attention in salt air | Moderate — cladding and joints should be checked periodically |
| Bare aluminum | More prone to pitting and corrosion near the water without a quality marine-grade finish | Higher — we generally steer bay-front clients away from this unless it's a high-spec marine finish |
Hardware — hinges, cranks, locks, and fasteners — deserves the same attention as the frame. We spec corrosion-resistant hardware and fasteners on projects close to the water, since standard-grade hardware can start showing surface corrosion years earlier in a salt-air environment than it would a few miles inland.
Glass Packages for a Cool, Wet Climate
Whatcom County's marine climate is mild but consistently damp, which shapes what glass package makes sense:
- Low-E coated dual-pane glass with argon fill is the standard baseline for new construction here — it manages heat loss well and helps control interior condensation during our cold, wet months.
- Triple-pane glass is worth pricing out on more exposed, wind-loaded elevations or where a homeowner wants the extra thermal and sound performance, though it adds cost and weight.
- Condensation resistance matters as much as U-factor in this climate — a window that's efficient but prone to interior condensation can contribute to the same moisture problems you're trying to avoid on the exterior.
We'll walk through glass options against the specific orientation and exposure of each opening rather than defaulting to one spec for the whole house — a north-facing bedroom window and a west-facing great room window facing the bay don't always need the same package.
Our New-Construction Window Process
On a new build or addition, timing is everything. Windows go in after the WRB is up and before siding starts, and that window installation has to be coordinated with the framer, the siding crew, and often the general contractor's schedule. Our process:
- Review plans and rough openings with the builder or homeowner before framing is finalized, to catch sizing issues early.
- Confirm window specs (frame material, glass package, hardware) against the site's exposure — bay-front, sheltered, north-facing, etc.
- Install sill pans, flashing, and windows in sequence as each opening is ready, rather than waiting to batch the whole house at once, which keeps the build moving.
- Document flashing details at each opening so there's a clear record of how water management was handled — useful for inspections and for the homeowner's records.
- Coordinate directly with the siding crew (often us, on siding-and-window combination projects) so the transition from window flange to siding is continuous and correct.
What Drives Cost on a New-Construction Window Job
| Factor | How It Affects Cost |
|---|---|
| Frame material | Vinyl is the most budget-friendly; fiberglass and clad-wood options cost more upfront |
| Number and size of openings | More openings and larger units (picture windows, sliders) add material and labor time |
| Glass package | Triple-pane, upgraded Low-E coatings, or specialty tints add cost per unit |
| Site exposure and access | Bay-front and higher-wind-exposure elevations may call for upgraded flashing details or hardware, adding modest cost |
| Coordination complexity | Jobs where we're sequencing closely with a framing or siding crew on a tight schedule can affect scheduling and labor efficiency |
We give straightforward, itemized estimates rather than a single lump number, so a homeowner or builder can see exactly what's driving the price on their specific project.
Why a Local Birch Bay Crew Matters
Window flashing is detail work, and details are where local experience shows up. A crew that's installed windows on multiple Birch Bay and Blaine builds already knows which elevations tend to take the worst of the winter storms, how far moss and algae growth typically creeps up a north wall by spring, and what wind exposure does to sealant and hardware over a few seasons. That's not something you learn from a spec sheet — it comes from working this specific stretch of Whatcom County coastline repeatedly.
It also matters for scheduling. New-construction window installs have to slot into a tight sequence between framing and siding. A crew based locally can be on-site reliably as that window opens, rather than working around a long drive that pushes the schedule for everyone else on the job.
Questions Worth Asking Any Window Installer for a Birch Bay Build
- Do you install true flanged, new-construction units, or are you adapting replacement-style windows?
- What's your sill pan and flashing sequence, specifically?
- Can you speak to frame and hardware choices for a salt-air environment?
- How do you coordinate scheduling with the framer and siding crew?
- Will I get documentation of the flashing details at each opening?
Let's Talk About Your Project
If you're framing a new home or addition in Birch Bay or elsewhere around Blaine, we're happy to walk the plans with you or your builder and put together a straightforward, no-pressure estimate for the window package and installation. Use the form below to get started.